Thomas Denney

Replicating Overcast's show notes

Early this week Marco Arment released Overcast, a really elegant new podcast app for iOS. The show notes aren’t displayed by default in the player, instead you swipe up on the show artwork to view them:

Overcast screenshot

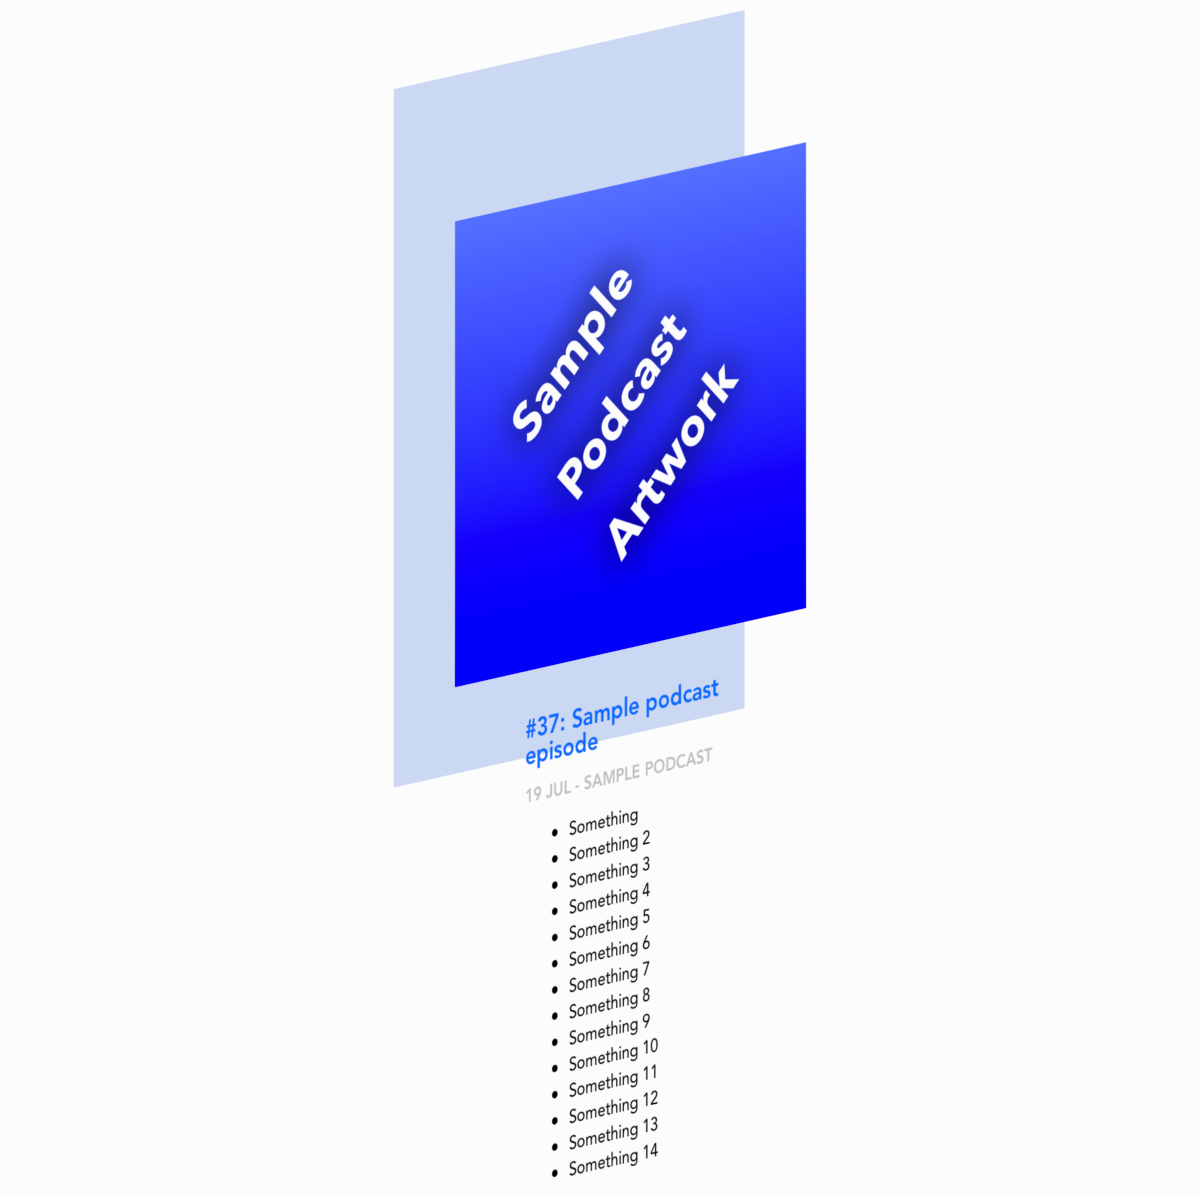
This is an effect that I quite like, so I thought I would take a look at how it could be implemented. Firstly, the show notes are probably presented using a UIWebView, because most podcasts use (relatively simple) HTML in their show notes. Secondly, a UIWebView is just a UIScrollView, so it is possible to add a contentOffset to the web view and display the artwork in an image view begins the web view. Here’s what that hierarchy looks like:

UI hierarchy

Therefore, all you really need to do is resize the image view as the web view, which is in front, is scrolled. This can be done with some simple code in the UIScrollViewDelegate:

CGFloat miniSize = CGRectGetWidth(self.view.frame) / 3;

if (scrollView.contentOffset.y < 0) {
    CGFloat size = miniSize;
    if (scrollView.contentOffset.y < -miniSize) {
        CGFloat offset = scrollView.contentOffset.y + 320;
        CGFloat fraction = 1 - offset / (320 - miniSize);
        size = fraction * (320 - miniSize) + miniSize;
    }
    self.artworkImageView.frame = CGRectMake(CGRectGetMaxX(self.view.frame) - size, 0, size, size);
    self.artworkScrollView.contentOffset = CGPointZero;
}
else {
    self.artworkScrollView.contentOffset = scrollView.contentOffset;
}

If the user has scrolled between the artwork and the ‘mini size’ then the shownotes will be displayed directly underneath. When the show note title is between the bottom of the artwork and the top of the scroll view, the artwork stays fixed, however when it will zoom when the title is below the artwork. The interaction itself is pretty simple, but I really like the way it works. You can find my full implementation on GitHub. Here’s a demo video:

iOS Developer FAQ

For the last few weeks I’ve been working on an extensive list of FAQs for new iOS developers, because they commonly need answers of questions that they may not know how to find. In order to write the FAQ, which is available on GitHub, I drew on my own experiences, StackOverflow, and /r/iOSProgramming.

I don’t want this to be a static document, so I’m actively looking for new questions and answers through issues and pull requests.

OpenCL fractal generation

I’ve been meaning to play around with OpenCL for a while (like a couple of years), so I decided to experiment with some of the basics. In this post I’m going to be focussing on using OpenCL on OS X to create some Mandelbrot fractals, so I’ll assume you’ve already read the first few chapters of Apple’s documentation (don’t worry, it doesn’t take long). If you want to skip the post and get straight to the code, please check it out on GitHub.

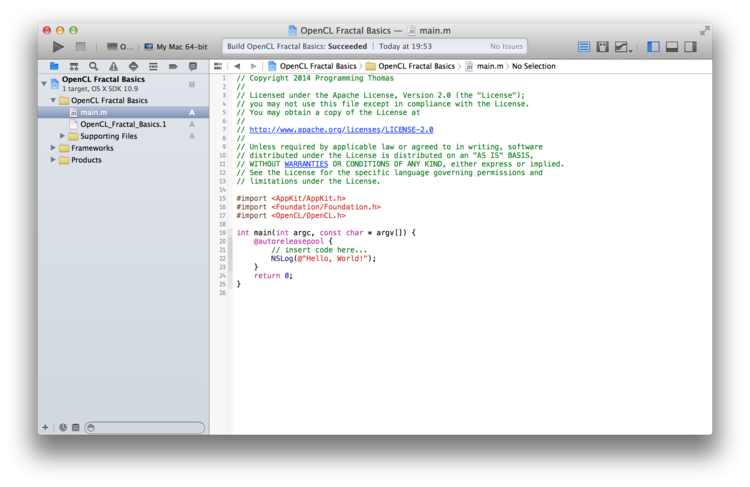
Start out by creating a new command line tool (Foundation) in Xcode, linking it with AppKit.framework, Foundation.framework and OpenCL.framework (you’re going to want to do this because we’ll need to write a tiny bit of Objective-C to save the images). Import these frameworks in main.m:

Fractals project

The next step is to actually write the kernel. OpenCL kernels are basically programs written in a C-like language that execute on the stream processors of the GPU, a little like OpenGL shaders (but way more powerful). The kernel is based off of this GLSL shader (so I won’t go into detail on complex numbers):

//mandelbrot.cl

const sampler_t sampler = CLK_NORMALIZED_COORDS_FALSE | CLK_FILTER_NEAREST;

kernel void mandelbrot(write_only image2d_t output, float width, float height, int iter) {
    size_t x = get_global_id(0);
    size_t y = get_global_id(1);

    float2 z, c;

    c.x = (float)width / (float)height * ((float)x / width - 0.5) * 2.2 - 0.7;
    c.y = ((float)y / height - 0.5) * 2.2 - 0.0;

    int i;
    z = c;
    for(i = 0; i < iter; i++) {
        float x = (z.x * z.x - z.y * z.y) + c.x;
        float y = (z.y * z.x + z.x * z.y) + c.y;

        if((x * x + y * y) > 4.0) break;
        z.x = x;
        z.y = y;
    }

    float p = (float)i / (float)iter;
    float so = sin(p * 3.141592653) * 255.0;
    float co = (1 - cos(p * 3.141592653)) * 255.0;

    write_imageui(output, (int2)(x,y), (uint4)((uint)co, co, (uint)(co + so), 255));
}

The kernel itself has several options, including the output image to write to, the width of the image, the height of the image (which are used to normalise the coordinates) and the number of iterations to do. This is fairly similar to the original GLSL shader, and it acts in a similar way because it is executed per pixel. Now we need the Objective-C/C code to run the kernel:

//At the top of the file
#import "mandelbrot.cl.h"

//Inside the @autoreleasepool in int main()

//1
dispatch_queue_t dq = gcl_create_dispatch_queue(CL_DEVICE_TYPE_GPU, NULL);
if (!dq) {
    fprintf(stdout, "Unable to create a GPU-based dispatch queue.\n");
    exit(1);
}

//Output size
size_t width = 1920, height = 1080;
//Number of iterations to do
int iter = 1000;

//2
//This actually comes out as an unsigned char *, however we can cast that to an unsigned int * to get four 8-bit channels
unsigned int * pixels = (unsigned int*)malloc(width * height * sizeof(unsigned int));

//3
cl_image_format format;
format.image_channel_order = CL_RGBA;
format.image_channel_data_type = CL_UNSIGNED_INT8;

//4
cl_mem output_image = gcl_create_image(&format, width, height, 1, NULL);

dispatch_sync(dq, ^{
    //5
    cl_ndrange range = {
        2,                  // 2 dimensions for image
        {0},                // Start at the beginning of the range
        {width, height},    // Execute width * height work items
        {0}                 // And let OpenCL decide how to divide
                            // the work items into work-groups.
    };

    // Copy the host-side, initial pixel data to the image memory object on
    // the OpenCL device.  Here, we copy the whole image, but you could use
    // the origin and region parameters to specify an offset and sub-region
    // of the image, if you'd like.
    const size_t origin[3] = { 0, 0, 0 };
    const size_t region[3] = { width, height, 1 };

    //6
    //Execute the kernel
    //mandelbrot_kernel is a GCD block declared in the autogenerated mandelbrot.cl.h file
    mandelbrot_kernel(&range, output_image, (cl_float)width, (cl_float)height, iter);

    //7
    // Copy back results into pointer
    gcl_copy_image_to_ptr(pixels, output_image, origin, region);
});

//8
//Finally, export to disk
NSBitmapImageRep * imageRep = [[NSBitmapImageRep alloc] initWithBitmapDataPlanes:(unsigned char **)&pixels
                                                                      pixelsWide:width
                                                                      pixelsHigh:height
                                                                   bitsPerSample:8
                                                                 samplesPerPixel:4
                                                                        hasAlpha:YES
                                                                        isPlanar:NO
                                                                  colorSpaceName:NSDeviceRGBColorSpace
                                                                    bitmapFormat:NSAlphaNonpremultipliedBitmapFormat
                                                                     bytesPerRow:4 * width
                                                                    bitsPerPixel:32];
NSData * outData = [imageRep representationUsingType:NSPNGFileType properties:nil];
[outData writeToFile:[NSHomeDirectory() stringByAppendingPathComponent:@"mandelbrot.png"] atomically:YES];


// Clean up device-size allocations.
// Note that we use the "standard" OpenCL API here.
clReleaseMemObject(output_image);

free(pixels);

This code does the following:

  1. Creates a dispatch queue for OpenCL. On OSX Apple has made it super easy to run OpenCL kernels by integrating them with GCD. On other platforms a lot more boiler-plate code is required
  2. Allocates some bytes for the image (notice that we allocate 4 bytes - 1 unsigned integer - per pixel for the RGBA channels)
  3. Creates a struct describing the image format (RGBA, 1 byte per component) for OpenCL
  4. Allocates OpenCL memory for the image
  5. On the OpenCL queue a range is created to describe the image (this should be familiar once you’ve read through Apple’s docs)
  6. Execute the kernel
  7. Copy the image data back to the main memory from OpenCL’s memory
  8. Create an NSBitmapImageRep for the data, encode that as a PNG and export to disk

Voila! You’ll find this in your home directory:

Generated fractal

As a bonus, I also stuck this in a loop and generated a video for the first 1000 iterations:

OpenCL is really powerful, and Apple has done an awesome job at integrating it into OSX and Xcode. This project doesn’t even begin to scratch the surface of what you can do with it. At some point soon I’m going to take a look at some more advanced topics such as image processing and integrating with OpenGL.

Cocoa OpenGL Template

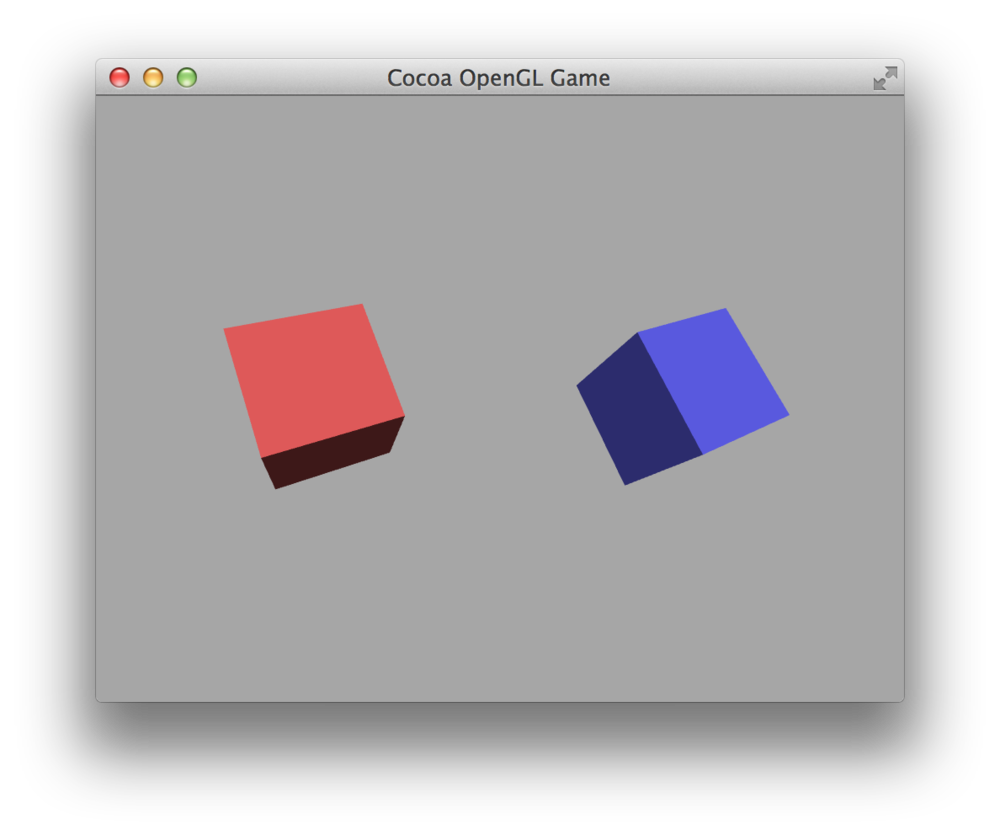
Cocoa OpenGL template

As well as creating an alternative OpenGL template for iOS, I’ve now created a template for OS X as well. This template is based off of the standard Cocoa application template, however also includes classes similar to GLKView and GLKViewController on iOS, as well as my GLProgram class. This makes it really easy to get started with OpenGL on OSX.

There are a few differences to the iOS version:

  • Targets OpenGL 3 (the iOS version targets OpenGL ES 2)
  • Uses the mouse to rotate the cubes (you can easily switch back to using an animation though)
  • Windowed (with fullscreen support) by default, however it also includes commented out code in the AppDelegate file that can be used to create a fullscreen window

You can download the template from GitHub to get started.

OpenGL template for iOS

Generally when I’m creating new projects in Xcode I use the ‘Single-view’ template because it tends to be the one that allows for the most customization, however when I do OpenGL work I always use the GLKit (‘OpenGL Game’) template. This is an OK template, but I keep finding myself deleting all of the GLKit effect based code and replacing it with my own shader class.

I’ve therefore created a new template for Xcode that only uses OpenGL shaders, hides the status bar, uses anti-aliasing, has a 60fps frame rate and follows some best practices recommended by Apple that the default template doesn’t.

In order to get started with the template, feel free to check it out on GitHub.

iOS icon grid for Opacity

Grid for Opacity

Opacity is a really great vector editor for Mac and I frequently use it for iOS icon design because it has a lot of features useful for development (for example, in Hipster Lab I used it to create Quartz drawing code for all the facial elements, removing the need for large varying-resolution PNG files). However, I only had the iOS 7 icon grid as an SVG file, so I set the grid up in Opacity and put it on GitHub.

The Opacity file can setup as a template (File > Save as new template) and it contains a layer for the template itself as well as layers for all the gradients and colours on ios7colors.com.

Knyt

After writing a Ruby tool that checks for the Apache license on Objective-C files, I’ve now written a tool called Knyt that checks whether Objective-C files conform to the New York Times Objective-C style guide. I’ve been writing Objective-C in this style for the last few months, but I thought it would be useful to be able to check over my code automatically and find parts where I’m not conforming. It’s a bit like unit tests, but for the source code rather than compiled code.

Knyt works by scanning a directory for Objective-C files (it can also scan subdirectories or just one file), reads them and then checks them against a set of rules, which in most cases are regular expressions of varying complexity. It then outputs any places where the rules aren’t being abided properly.

The full set of rules hasn’t been implemented because many rules are vague (‘the ternary operator should only be used when it improves clarity’) or can’t be implemented context free (dot notation being used for accessing methods rather than properties, for example) however the majority of the rules that affect the style have been implemented.

In order to use Knyt you will firstly need to clone the Xcode project from GitHub. It compiles correctly on Mavericks (and presumably Mountain Lion) using Xcode 5 in its standard configuration. If you want to test it directly from Xcode you will need to edit the scheme’s arguments and change them to use your code directory. Alternatively, build the project and use the ‘Show in Finder’ option to find the produced executable. Whilst the project is still in alpha I won’t be adding an executable on GitHub.

Reading OS X reviews

Over the course of the last week I’ve reread all of John Siracusa’s OS X reviews for Ars Technica, starting with OS X Developer Preview 2 and finishing with OS X Mavericks. This page handily lists all of the reviews (earlier reviews linked back, but this pattern ended at 10.5).

My motivation was to learn a little more about the history of OS X, as I’ve only been using Macs since Snow Leopard. These reviews are a great place to get a sense of the history of the OS because they were written at the time of each version’s release, rather than having been updated regularly with new information, like the Wikipedia articles.

The pattern of the early reviews (the first seven are all about 10.0 and its betas) was focussing on the differences between OS X, raw UNIX and Mac OS 9. Whilst 10.0 is very different there are striking similarities to the OS X I use everyday: it still had Aqua, HFS+, Cocoa, etc. A lot of the key differences, for Siracusa at least, were the user interface and experience, the Finder and the file system (there was also a font kerning issue in the Terminal for several versions that was his pet peeve).

As OS X progressed, the reviews did too. Up until 10.4 Tiger, the reviews often discussed the performance changes from the previous version (especially the fact that they got faster on the same hardware), whereas after this performance improvements were much smaller (Siracusa, whilst expressing admiration, did point out that the cynic’s response is that 10.0 was so slow, which is why there was so much room for performance improvements).

Most early reviews also advised the reader on whether or not they should upgrade, especially given that each new release was a $129 upgrade. Later reviews do not even consider this (at one point Siracusa even considered it a compulsory ‘Mac tax’) but with Mavericks being free, price is given a final consideration in its review. Modern reviews seem to have this pattern:

  • Introduction and summary of expectations from the last review
  • The new features
  • Performance changes, if any
  • Kernel changes and enhancements
  • New technologies and APIs, if any
  • File system rant (which, having read the earlier reviews and got some context, now seems justified)
  • Grab bag (summary of minor apps and changes)
  • Conclusion and looking ahead to the future

The evolution of OS X is fascinating from a user and developer perspective. As new developer technologies, like Quartz 2D Extreme/QuartzGL, Core Image/Audio/Video, OpenCL, Objective-C 2.0, Blocks, GCD and ARC, emerged each was carefully explained. Whilst I am familiar with these technologies today it was awesome to see when, why and how they were released. Transitions in other areas (32-bit to 64-bit, PowerPC to Intel, ‘lickable’ Aqua UI to a more flat UI) was also interesting to read about, especially given a modern perspective.

Reading the reviews in 2014 has been fun, especially considering that some of them are almost 15 years old. Often Siracusa made predictions of varying accuracy:

  • Tags were predicted in the Tiger review
  • High DPI/retina displays were predicted when support was first added in OS X (although retina displays weren’t considered until the Lion review)
  • HFS+ would be replaced
  • Macs with 96GB of RAM (this was in the Snow Leopard review, but the current Mac Pro can be configured to ship with up to 64GB and supposedly supports up to 128GB)

Another interesting series of articles was the ‘Avoiding Copland 2010’ series which were written in 2005 and discussed the various enhancements that Apple would have to make to Objective-C in order for it to remain competitive with other high level languages. I also recommend listening to the associated 2011 episode of Hypercritcal, A Dark Age of Objective-C. With the recent debate over whether Objective-C/Cocoa should be replaced (they shouldn’t), these articles are surprisingly relevant.

I highly recommend reading the OS X reviews if you’re a developer and haven’t read them before, or are just interested in the history of the OS. I ended up reading all of the reviews in Safari’s reading mode because it was able to take the multi-page reviews and stick it in one page (albeit with some images missing) - in the past I had used Instapaper for this but it occasionally seems to miss multi-page articles.

Checking Apache licenses on Objective-C files

At the moment I’m putting together an open-source library based off of some classes that I’ve been sharing between some of my iOS apps for a while. I wanted to check that I had the Apache license at the top of each file, and that it followed this format:

// Filename.h/Filename.m
//
// Copyright 2013/2014 Programming Thomas
//
// Licensed under the Apache License, Version 2.0 (the "License");
// you may not use this file except in compliance with the License.
// You may obtain a copy of the License at
//
// http://www.apache.org/licenses/LICENSE-2.0
//
// Unless required by applicable law or agreed to in writing, software
// distributed under the License is distributed on an "AS IS" BASIS,
// WITHOUT WARRANTIES OR CONDITIONS OF ANY KIND, either express or implied.
// See the License for the specific language governing permissions and
// limitations under the License.

I could have checked through each file individually, however I decided that I probably ought to get round to trying Ruby at some point, so I ended up putting together this simple script:

def copyright(fname, year, programmer)
  return "// #{fname}
//
// Copyright #{year} #{programmer}
//
// Licensed under the Apache License, Version 2.0 (the \"License\");
// you may not use this file except in compliance with the License.
// You may obtain a copy of the License at
//
// http://www.apache.org/licenses/LICENSE-2.0
//
// Unless required by applicable law or agreed to in writing, software
// distributed under the License is distributed on an \"AS IS\" BASIS,
// WITHOUT WARRANTIES OR CONDITIONS OF ANY KIND, either express or implied.
// See the License for the specific language governing permissions and
// limitations under the License."
end

def file_matches(path, years, programmers)
  file = File.open(path, "rb")
  contents = file.read
  basename = File.basename(path)
  file.close
  if not years.respond_to?("each")
    years = [years]
  end
  if not programmers.respond_to?("each")
    programmers = [programmers]
  end
  
  programmers.each do |programmer|
    years.each do |year|
      if contents.start_with?(copyright(basename, year, programmer))
        return true
      end
    end
  end
  return false
end

def walk(dir, years, programmers)
  if File.readable?(dir)
    Dir.foreach(dir) do |basename|
      next if basename == '.'or basename == '..'
      fullname = File.join(dir, basename)
      if File.directory?(fullname)
        walk(fullname, years, programmers)
      elsif basename.end_with?('.h', '.m', '.pch')
        if File.readable?(fullname)
          if not file_matches(fullname, years, programmers)
            puts basename
          end
        end
      end
    end
  end
end

if ARGV.length == 3
  directory = ARGV[0]
  programmers = ARGV[1].split(',')
  years = ARGV[2].split(',')
  walk(directory, years, programmers)
else 
  puts "Usage: ruby apache.rb directory programmers,by,comma years,by,comma"
end

Overall Ruby was pretty easy to pick up (although I imagine the above looks awful to a seasoned Rubyist) and so I was able to quickly check over the source files :).

Birthday